
The Configuration Challenge
Creating, updating and translating picklist values in Salesforce can be a time-consuming exercise. In this article, I will:
- Review how this is done manually via the Salesforce Setup UI.
- Briefly examine the metadata XML file that can be extracted and deployed via the Salesforce Command Line Interface (CLI).
- Demonstrate how an Excel-based data dictionary can be used as input for the SfMetadataToolkit to generate deployment-ready metadata.
Via The Salesforce Setup UI
This requires multiple steps in the Setup UI. A typical sequence to add and translate values looks like this:
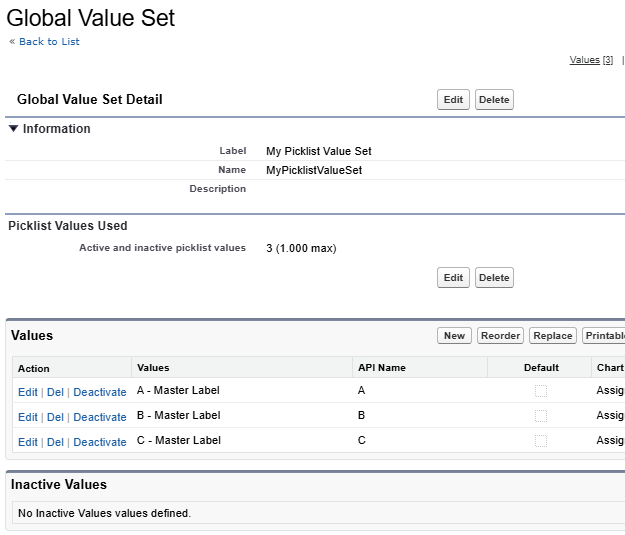
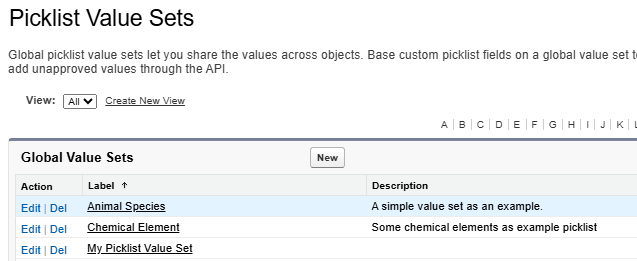
- Navigate to the Global Value Set / Picklist Value Set:
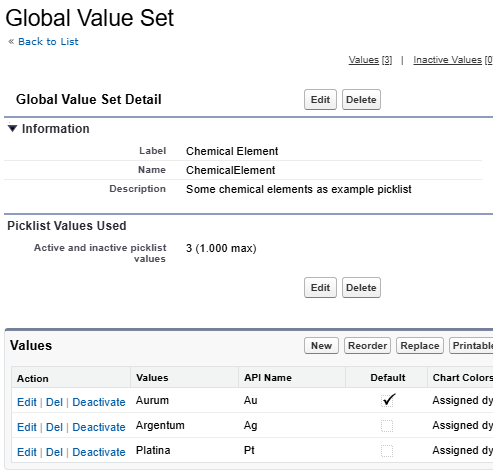
- Click
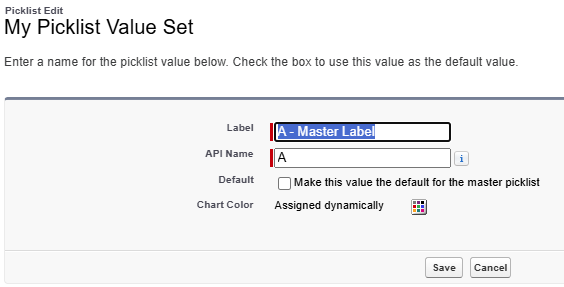
Newto add new picklist values. This is the only step in the sequence where a bulk-operation is possible by copying and pasting multiple values in one go. - If you want the Master Label to differ from the API value, then go through all values one by one and click
Editto update Label and/or API Name. - If you want to reorder the values to a specific sequence, click
Reorderto move individual values up and down, one click at a time.
- Click
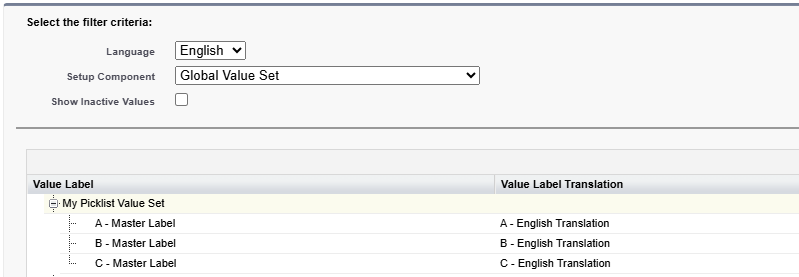
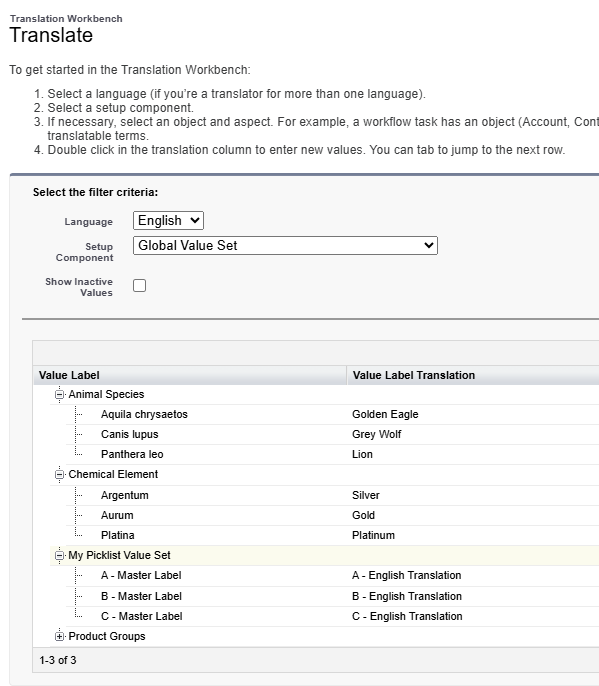
- If you then want to translate the labels, you have to go to a different setup screen: Navigate to the Translation Workbench:
- Select the first language.
- Navigate to Setup Component ‘Global Value Set’.
- Select the value set and wait to see the current translations.
- Click through all translations to add/update.
- Click
Save.
- If you need this for another language, repeat the Translation Workbench process.
Obviously, this is not an efficient approach for more than some one-off changes.
Via the Salesforce Command Line Interface (CLI)
With the Salesforce Command Line Interface (CLI, also known as SFDX), you get direct access to the raw XML version of the metadata, in this case a Picklist Value Set, in your local file system:
- Retrieve the files via
sf project retrievecommand(s), e.g. as given below. - Edit the XML file(s) as needed.
- (Re-)Deploy with the corresponding counterpart
sf project deploy start ...
| |

| |
| |
Obviously, this isn’t an efficient approach either because you now have to deal with XML syntax and its associated pitfalls.
Introducing SfMetadataToolkit
This approach at a glance:
- Fill your picklist values, labels and translations into an Excel (or a corresponding .csv) template.
- Run the toolkit’s importer and builder commands to create the corresponding metadata XML files
- Optionally, run the diff tool of your choice (e.g. git diff) to see changes.
- Use
Salesforce CLIto deploy.
The full benefit is realized if you use the spreadsheet as a Data Dictionary holding the source of truth: The Data Dictionary is the documentation that is always up to date because the metadata is automatically derived from it.
Build Metadata From The Excel-based Template
Fill in the worksheet _GlobalValueSets to declare the Global Picklist Value Sets to be created:

Fill in the worksheet _PicklistValues and for each Picklist Value Set, define the order, values, labels and translations as needed:

Run the following toolkit commands:
| |
Build Metadata From The CSV Template
The toolkit also accepts CSV files as long as those are structured the same way. So, if you prefer sources other than Excel, here is the way to go.
Prepare the file _GlobalValueSets.csv:

Prepare the file _PicklistValues.csv:

Put all relevant CSV files together into one directory and run the following toolkit commands:
| |
Examine and Diff the Result Files as Needed
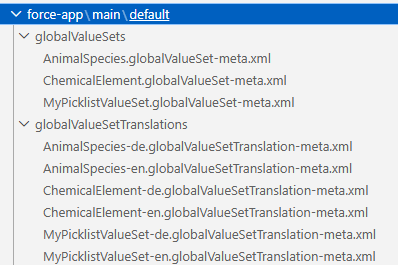
The resulting files in the force-app folder look like this:
Deploy…:
| |
…and enjoy:
How It Works
The SfMetadataToolkit operates on top of the Salesforce project structure managed by Salesforce CLI. It does not communicate directly with your Salesforce org nor does it issue any sf cli commands on its own. Instead, it only reads from and writes to the *.*-meta.xml files in the force-app folder. So it can be combined with any DevOps/deployment workflow, IDE and diff tool (git or non-git-based) of your choice.
NoteIf you don’t yet have a full developer setup: The minimum requirement is the CLI itself. You don’t have to set up VS Code (Notepad++ with XML plugin will do), you don’t need git (any file diff tool of your choice will do, e.g. Notepad++) and you don’t need to configure a Dev Hub.
You can use it for any one-off mass-creation of picklist values. The full strength of this approach, however, becomes apparent when you let the data dictionary be the source of truth for your implementation. With the metadata created from the documentation, the documentation and the implementation will always be in sync.
With certain limitations, it will also support a round-trip approach where the data dictionary Excel can be reverse-engineered from the org’s metadata.
How To Get It
The module is based on PowerShell 7.x, which is open source and available on Windows, macOS, and Linux:
The SfMetadataToolkit is published on Codeberg and on the PowerShell Gallery:
- SfMetadataToolkit
- To install:
Install-Module -Name SfMetadataToolkit - Codeberg Repo
PowerShell directly supports importing from and exporting to CSV files. To work with .xlsx files, the ImportExcel module needs to be installed from the PowerShell Gallery:
- ImportExcel
- To install:
Install-Module -Name ImportExcel - GitHub Repo
What’s Next
This Data-Dictionary-driven approach has been battle-tested in various projects over the past years. The PowerShell code is currently being refactored and cleaned from some technical debt in order to be published as open source gradually. So stay tuned to see more functionality to come.